How is rectangular ductwork joined together?
There are two commonly used methods by which the individual duct pieces are joined to each other: frames, and slip joints. There is a third method which uses a system of 'drive cleats' but it's not very common in the UK, and it's not a method we use.
|
Frames have been used to create flanges on ductwork for many years. In early ductwork installations the frames were typically manufactured from rolled steel angle. Lengths were cut, welded together to make the frame, matched drilled, and then riveted or screwed to the ductwork pieces. It was a time consuming process, and although still sometimes used, since the mid 1970's it has largely been replaced with frames that are assembled from sheet steel profiles (see image).
|  |
|
|
These profiles come in various widths and are available from various manufacturers. This framing system was originally devised in 1969 by a German sheet metal engineer called George Mez. His company, Mez-Technik, still manufactures the system today and the frames are often referred to as 'Mez frames'; in fact they are usually called 'Mez frames' regardless of the actual manufacturer; rather like vacuum cleaners are referred to as 'Hoovers'. In our factory we use another similar system called Doby which is made by a company called Doby Verrolec, and although we refer to them as Mez frames amongst ourselves, we use 'Doby frames' on the website.
|
 | The widths available are typically 20mm, 30mm, and 40mm, and the size used depends on the size of the duct itself. Ductwork manufacturers follow a document known as DW/144 which is supplied by the HVCA (Heating & Ventilating Contractors' Association). This document provides the industry standard specification for the correct frame widths as well as much more information pertaining to ductwork manufacture and installation. |
|
|
The correct frame widths are also governed by other factors such as system pressure and the use of 'stiffeners'. It can get a little complicated, but as a general rule 20mm flange is fine for ducts no bigger than 1m in size in the longest dimension; 30mm can be used for ducts from 1m up to 2m, and 40mm is used for ducts above that. For example, a duct of 800mm x 800mm can use 20mm flange, but 1100mm x 200mm will need 30mm flange. The sheet metal flange is cut to length and then assembled with corner pieces. These corner pieces have pre-punched holes on them which provide the means to bolt the duct together. The frames, once assembled are fixed to the duct using rivets, spot welds, or a cold forming process known as 'clinching'.
|
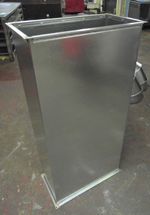
The image on the right shows a length of straight duct with Doby frames fixed in place. Most of the ductwork pieces are delivered to the job site with these frames ready fixed to the duct, meaning, in theory at least, that assembling the ductwork system is simply a matter of bolting the sections together. However, even after much design work carried out prior to manufacturing and installation, the need for a little trimming here and there is not uncommon. For this reason, certain sections of the duct system - typically straight sections - may be supplied with one frame loose, that is, it's sent with the job but not fixed to the duct. The loose frame is fixed by the installer once he is satisfied that the duct section is the correct length. These sections are often labelled by the factory staff as 'site trim' or something similar.
|
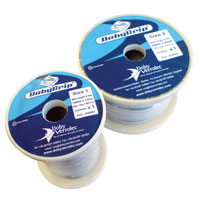
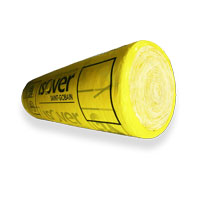
 | Before the duct pieces are joined together, it's important to apply a gasket material between the flanges. A neoprene gasket in the form of a self-adhesive tape is the most commonly used. This tape is available in rolls. We have this tape available for purchase on the website, both as individual rolls or full boxes of 32 rolls.The picture on the left shows a length of duct with the tape applied and ready for connection to the next piece. |
|
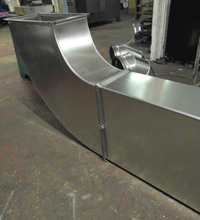
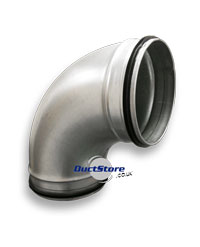
The duct pieces can then be bolted together using either 8mm or 10mm bolts depending on the flange size used. Duct pieces are often lifted into place, that is, into their final position, one piece at a time, either by manual lifting or by the use of lifting equipment. For smaller ducts it's usual to bolt two or three pieces together before lifting them into place onto the supports. The picture on the right shows our length of straight duct from above bolted onto a radius bend. You may have also noticed there is something halfway down the duct where the flanges are bolted together. This is a G clamp.
|
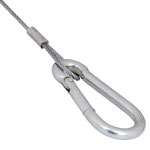
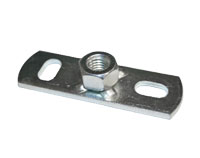
 | G clamps are generally supplied by the manufacturer of the duct flange profiles, and can be purchased on our website. Mez frames only bolt together on the corners so you can understand that on larger ducts extra clamps will be required. We use them on ducts that measure over 500m and place them every 300-500mm depending on the system air pressure. The duct in the picture above measures 600x300mm, so one clamp is sufficient on the 600mm side. Large ducts may have many of these clamps. As well as clamps there also cleats available for the same purpose, although we prefer the clamps as they are a little easier to use. |
|
Slip Joints
Joining duct pieces together with slip joints simply means slipping each part into the next and fixing with screws or rivets. The ducts are prepared during manufacture to enable a male/female connection (sometimes referred to as a 'socket & spigot' connection). Most of the duct pieces using this connection method will have a female (socket) connection one end and a male (spigot) on the other. Sometimes a piece may require a male or female connection one end but a different connection at the other, such as a Mez frame or a sheet metal flange if it terminates with a grille, or connects to a piece of ventilation equipment. It really depends on the layout of the overall system. Slip joints are often used on small ductwork as frames are not necessary on ducts under 400mm in the longest dimension as they do not require the extra rigidity and 'stiffening' that the frames provide. That's not to say that Mez frames can't be used for smaller duct too, in fact it is possible to produce frames as small as 100mx100mm. Slip joints are sometimes preferred on smaller ducts when they need to be fed through small spaces. Mez frames add to the overall size of the duct and this may cause problems during installation. |
|
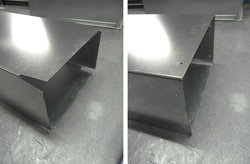
The images on the right show the male and female ends on slip-jointed duct. You will notice on the male that a portion of the sheet metal has been removed from each corner. This is what enables it to slip inside the next piece. The female end is nothing more than a plain end but with fixing holes punched into it. The holes are punched during manufacture and aid in drilling and connecting the duct at the job site.
|
|
The pictures below show the process of making up the joint. The two sections are pushed together, drilled, and riveted (self-drilling screws can also be used, as well as self-tappers). Once it's all fixed it will need to be sealed. We've used duct sealant in our example but you can also use tape, or a combination of both. It's also a good idea to ensure that the slip joints follow the direction of airflow. In our sample piece the airflow would be left to right.
|
| |
 Ltd. Ventilation Ducting")