Ltd. Ventilation Ducting")
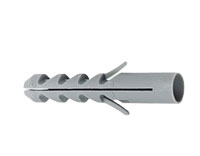
Nylon Wall Plugs 8mm - Box of 100
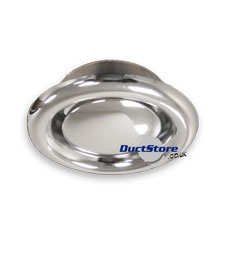
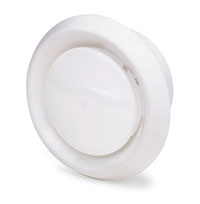
150 dia Plastic Supply/Exhaust Valves
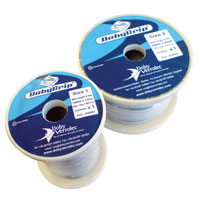
2mm Wire Rope 150m Reel
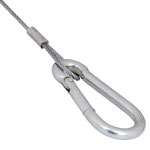
Wires with Carabina 2mm x 2m - Pack of 10
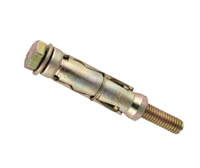
Shield Anchors M8
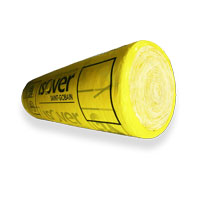
Ductwrap - Isover ClimCover Alu2 25mm 18m Roll
Delivery
- How long before I can expect to receive my order?
- I received my order, but some bits are missing. Why isn't it all there?
- Can I collect from you?
- I might not be around when you deliver. Can you call to advise me on when it's coming?
- I've received my order but it's wrong. What should I do?
Ordering & Payment
- Is it safe to enter my payment details into your site?
- What cards are accepted?
- I don't have any cards or a Paypal account. Can I pay by cheque?
- Can you accept cash on delivery?
- I made an order but forgot something. How can I add to my order?
- Can I order over the phone or by fax?
- Will I get a VAT invoice?
- Is it possible to set up a business account with you?
- I only need to buy one small item. Do I have to pay the £12.95 fixed shipping price?
Products
- Do you have a catalogue with prices that you could send me?
- There's some stuff I need that isn't on your website. How can I order those bits?
- How can I get more information about the products?
- You have the stuff I need but not in the size/s I need. Can you help with that?
- Is 80mm dia the smallest you do?
- Is 630mm dia the biggest you do?
- Do you sell rigid plastic duct?
Working with Ductwork
- How does the spiral ducting fit together?
- What's the best way to cut spiral tube?
- How do I know what size I want?
- What's the right way to hang the duct?
- I want to fix ducting vertically to a wall. How do I do that?
- Do you offer an installation service?
How long before I can expect to receive my order?
Our new larger warehouse facilities has enabled greater stockholding and many orders now go out on a next day basis if held in stock. While this is probably the majority it can't always be guaranteed. For example some products are manufactured to order and typically take anything from one extra day to two weeks if the order is large. In some instances simple logistics concerning distances may mean extra days are required to arrange and coordinate delivery. Please be sure that we always endeavour to dispatch goods as promptly as possible. If you're working to a tight deadline and need a clear estimate of when you can expect to receive an order you have made, or intend to make, please give us a call.
I received my order, but some bits are missing. Why isn't it all there?
In most cases this will simply mean that the order has been split into 2 or more shipments. This will either be because they are coming from a different courier or the delivery times on the individual products aren't the same. If you still feel something is wrong please call on 01375 390149 asking for Maddie or Beth.
Can I collect from you?
Yes you can collect from our Warehouse, although we recommend that you contact us first to confirm availability of the parts you require.
I might not be around when you deliver. Can you call to advise me on when it's coming?
If your order is sent through a courier or the PO this won't be possible, although we will try to advise you of the day. If it's a larger order and is coming direct from a supplier, the driver will often give you a call shortly before delivery. Please request a call in the 'Delivery instructions' field when checking out if this is a must.
I've received my order but it's wrong. What should I do?
Please check that you made the order correctly; the drop-down-menu nature of the site means that it's easy to make a mistake with sizing. If you have double checked and it's definitely wrong give us a call and we'll work to rectify the problem immediately.
Is it safe to enter my payment details into your site?
Yes. All personal information and all card payments are processed over a secure encrypted link using Secure Socket Layer (SSL) technology. When proceeding through checkout look for the little gold padlock in the bottom right of your browser, or in the URL bar. Payment details are not held on our system.
What cards are accepted?
We can accept Mastercard, Visa, Maestro, Switch, Solo, Delta, and Visa Electron cards. We also accept Paypal payments.
I don't have any cards or a Paypal account. Can I pay by cheque?
Yes. Please make cheques payable to P&G Fabrications Ltd. and send along with your order and details to Unit 39, Globe Ind. Est. Grays, Essex RM17 6ST.
Can you accept cash on delivery?
We're sorry but we are not able to accept cash on delivery.
I made an order but forgot something. How can I add to my order?
Assuming your order hasn't been dispatched (you would receive an email notification of this), you can simply make another order and select 'Deliver with outstanding order' from the Shipping and Handling section during checkout. This will waive the delivery charge on the additional order.
Can I order over the phone or by fax?
Yes. You can phone and/or fax with your order and payment details if you wish. Call 01375 390149, fax 01375 391195. When calling ask for Beth or Maddie.
Will I get a VAT invoice?
We typically send all invoices by email as a PDF attachment within 48 hours of dispatch.
Is it possible to set up a business account with you?
Yes. We can set up accounts for registered limited companies. Please use the Contact Us page to request a credit application form.
I only need to buy one small item. Do I have to pay the £12.95 fixed shipping price?
Yes. We have elected to use a fixed shipping price rather than employ a minimum order value. If you have made a previous order and perhaps forgot something, please give us a call and we may be able to reduce the shipping for the extra if the first order has already shipped.
Do you have a catalogue with prices that you could send me?
We don't have a catalogue as our products are based online. Everything we sell is available to see on the website along with the prices. Extra information on all products will be added shortly.
There's some stuff I need that isn't on your website. How can I order those bits?
If you cant find what you need, please use the Contact Us page to send us an email stating what youre looking for and well get back to you as soon as we can. Note also that more products will be added over time.
How can I get more information about the products?
We will be adding extra information to the individual product pages shortly. In the mean time, send us a message and we'll provide you more info and/or a spec sheet.
You have the stuff I need but not in the size/s I need. Can you help with that?
If you need something in a non-standard size we may be able to manufacture it for you. Use the Contact Us page to send a message.
Is 80mm dia the smallest you do?
Yes. Only dust extraction hose is available in smaller sizes.
Is 630mm dia the biggest you do?
We can manufacture rectangular duct to any size and provide spiral duct and fittings up to 1m diameter.
Do you sell rigid plastic duct?
No, we do not supply rigid plastic duct.
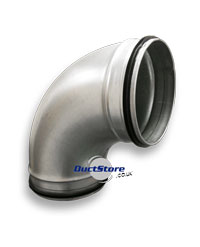
How does the spiral ducting fit together?
Round spiral ductwork and fittings; bends, reducers etc. slip together much like plumbers copper pipe. However, whereas the plumbers fittings generally slip over the tube, ductwork fittings slip inside the spiral tube. Therefore a ductwork bend will be slightly smaller than the nominal size. For example, a 100mm bend will actually have a diameter of roughly 98mm, enabling it to slip inside the tube, which actually measures 100mm.
All fittings, thats everything except the tube itself are male i.e. it slips inside. Outlets on machines (fans, canopies, dryers etc.) are generally also male. With this in mind you can understand that, for example, a 125mm bend wont fit directly to a 125mm outlet on a machine; theyre the same size.
If you want to connect two fittings together directly, or a fitting to a machine, youd use a female coupler, which on a practical level is a very short piece of tube. Male couplers are of course used to connect lengths of tube. Female couplers wouldnt do this because theyre the same size as the tube.
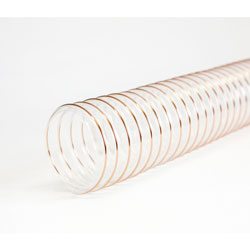
Flexible ducts are much like spiral tube in that they will slip over fittings; in most cases it will slip over spiral tube too, although it may be tight, in which case you could fit a male coupler into the tube before fixing the flexible duct.
Once slipped together, joints are typically fixed with rivets or self-tapping screws, although nowadays self-drilling screws are favoured by most installers as it enables them to get the job done quicker. Sealant is then applied around the join. Once set, the sealant is very effective and results in a much more efficient system. Alternatively, sealant may be applied into the tube prior to fixing together. This has the advantage of being neater and easier to apply, but can cause problems if the duct ever needs to be dismantled as the sealant itself acts like a very tough glue. Duct tape is another simple and effective method of sealing, although over the years it will eventually dry out and come loose. Note also that self-sealing duct fittings are also available; these carry EPDM rubber seals and, although a little more expensive, do not require sealant or tape. Hose clips are used to fix flexible ducts.
What's the best way to cut spiral tube?
You are likely to get various answers depending on who you ask but (assuming you don't have access to a Lindab SR Cutting Machine, which of course you are unlikely to have) we find the best method is to use a quality jigsaw with a blade suited to cutting thin sheet metal (a good blade choice might be, a Bosch T118G or a Dewalt DT2162-QZ).
Place the duct on a clear flat surface. On the floor is fine. Mark the duct at various points around the circumference e.g. if you want to cut a 1m length you measure from the end 1m and place a mark. You then make further marks around the duct 50-150mm apart depending on the duct diameter. Marking all the way round is important. If you don't it's likely that you'll find yourself cutting off line. When you get back round to where you started, you may find you have 'missed' and have to do a sharp turn to meet up with the initial cutting point. Drill a suitable size hole (8-9mm) to allow you to insert the jigsaw blade and slowly and carefully cut around the duct following the marks you made earlier.
We strongly recommend that you use protective eye wear when using a jigsaw. The swarf typically flies out in a forward direction but it's not uncommon for it to come upwards towards the face. You might want to use protective ear wear too, as this method is very noisy.
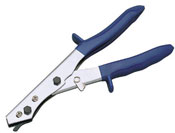
Another simple and clean, albeit rather slow, method is to use a hand nibbler (see pic below). These are inexpensive and made by Draper, Monodex, and Sealey. As with the jigsaw, you will need to drill a hole to start and you may need to use a hacksaw on the seam, but they are ideal if you are only making a few cuts.
While it is certainly possible to use an angle grinder with a thin metal cutting disc, it's generally not recommended. It's a rather crude, dangerous, and dirty method and can leave the duct with some very sharp edges. If you do use an angle grinder, protective eye wear is a must and safety gloves are a good idea.
Edit: cutting discs have moved on since this was originally written and the new thin discs do a good job of cutting spiral tube with minimal burring.
Lastly, it is possible, certainly on smaller diameters, to use a hacksaw. However, it can be slow, laborious, and sometimes quite frustrating.
What's the right way to hang the duct?
There is no simple answer here because exactly how duct is suspended is determined by various factors. For example, the construction of the building will play a large part i.e. what kind of fixing is used will be determined by the construction of the ceiling. The distance from ceiling to duct is another factor, as well as duct size. Aesthetics may also play a part (if the duct will be on show), and of course personal preference i.e. what's easier for the installer. The method of suspension may have been already determined by an authorised body responsible for overlooking the work being carried out.
None of this means hanging duct need be in anyway complicated. Below is a brief outline of various methods commonly employed.
Suspension rings, Split rings, and Support Banding
Suspension rings and split rings are similar in that they both comprise of a rigid steel ring that's fixed around the duct. Suspension rings come with a nut that is fixed centrally to the upper half of the ring. One length of threaded rod can be screwed into this and then fixed by whatever means are necessary into the ceiling above. The lower half of the ring is screwed to the upper half. These screws are provided as part of the unit.
Suspension rings offer great benefits in that they are simple and easy to use, requiring just one stud and one fixing. The disadvantage however is that any height adjustments that may need to be made on the newly installed duct are made difficult by the design of the ring; the duct height cannot be altered at the low level, the point at which the stud screws into the ring. Height adjustments may be possible at the other end of the stud, at the ceiling, but this will depend on the type of fixing used. If this isn't possible, such as in the case of an anchor in concrete slab, the stud will need to be removed and either cut down (ducting raised) or replaced with a longer stud (ducting lowered). This problem isn't encountered with split ring supports.
Split rings differ in that both halves of the ring are the same, they have no nut on top. Instead two studs(threaded rod) are dropped through holes on each side of the ring. Nuts on the rod are tightened to clamp the ring around the duct. Height adjustments can be made easily by winding the nuts up or down the studs as required.
An alternative to suspension and split rings is support banding. Support banding is an inch wide light-gauge mild-steel banding with pre-punched holes for bolts and fixings. It's generally supplied in rolls from which you cut the lengths required with a pair of tinsnips. It is most commonly used in a loop fashion as seen in the drawing below. A rough noose shape can be formed in the banding prior to lifting the duct into place.
Alternatively a u-shape can be used if space is tight between the ceiling and duct:
The advantages of support banding are its simplicity and low cost. However its use is generally limited to installations where the duct won't be visible, such as above suspended ceilings or in loft areas. Use of support banding on exposed duct will give a less than professional end result. Support banding is not suitable for larger diameter ducts as there are limits on the weight the banding is capable of supporting.
Fixings Used
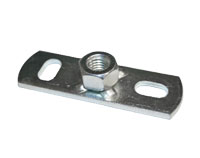
The fixings used will depend on the construction of the ceiling/roof. The simplest example would be anchors into a concrete slab. The size of anchor used will match the size of the threaded rod; M8 anchors for M8 rod etc. Up to M10 the hole size required however is generally always 2mm larger than the nominal size of the fixing, so for an M8 anchor you need to drill a 10mm hole, 12mm for M10. Once anchors are pushed into the hole it's important to hammer the inner peg up with a punch (a large nail will do the job if you don't have a punch). An optional nut and penny washer can be used on the stud to give a smarter finish and to ensure the stud doesn't come loose.
Use beam clamps to fix to existing steelwork. Purlin clips and vertical flange hangers can be used to fix to structural purlins. Use wedge nuts to fix to ribbed taper decks:
You may find that there isn't any clear fixing point above the area where the proposed duct will run, for example if steelwork overhead runs parallel to the duct run but isn't directly above it. When the steelwork runs perpendicular i.e. across the run of duct, it's generally always possible to drop threaded rod directly from overhead beams or joists. When they run parallel however it's likely that you will need to span across using support channel. Studs can then be dropped from the support channel using channel slide nuts. In the case of steelwork you can use beam clamps specifically designed for this purpose (do not drill holes in structural steelwork).
Alternatively support channel can be used in the manner shown below, sandwiching the steelwork. 40x40mm channel is best suited to this method, although 40x20mm will work fine for smaller diameters.
Use the following arrangement at the top of the stud when support channel is used:
The basic principle of using support channel to create a span can also be used on wooden joists supporting a plasterboard ceiling. If the joists aren't visible they can be found by knocking a knuckle lightly on the ceiling and listening to the sound it makes; once a hollow donk becomes more of a dull thud you will have found a joist (the sound difference can be quite subtle). Use a cordless drill with a small bit to drill into the ceiling to confirm the location of the joist. From there the adjacent joists will often be on 16" or 24" centres. Support channel can then be screwed to the joists using either coach screws, or standard wood screws (using M6 penny washers with the screws will allow you to use the large holes already present in the channel).
Support channel can also be used on wooden joists that run perpendicular to the duct.
The same methods described above can also be applied to the suspension of rectangular duct; the only difference being the use of support channel underneath the duct in place of the rings or banding used with circular duct.

Use the arrangement illustrated below at the bottom of the stud. The nut and penny washer above the channel can be used to lock off the support once the correct height is set.

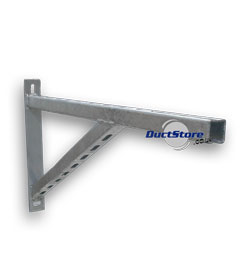
I want to fix ducting vertically to a wall. How do I do that?
Update: as well as the method described below, we now have vertical wall supports available on the website (diameters 80-250mm). These supports can be found on the page linked below.
Vertical wall supports for round spiral duct..
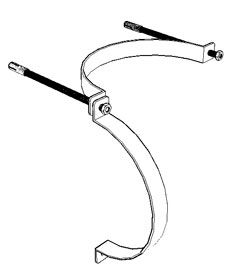
Wall brackets can be made up from other components. Split ring supports can be used along with studs (threaded rod) to make an effective bracket. To fix to a solid brick wall anchors can be used (see diagram below). To determine the length of the stud, add the distance you want the duct to sit from the wall (50-75mm is about right if there are no obstructions) to half the diameter of the duct, and then add another 30-40mm.
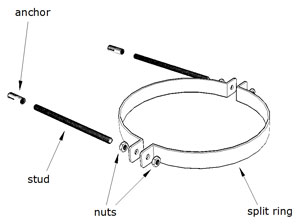
Once the bracket is correctly fixed in place hang the outer half of the ring on one of the studs as shown in the diagram below. It's now ready to take the duct.
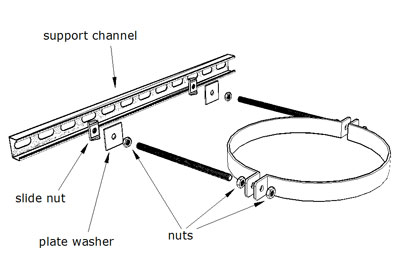
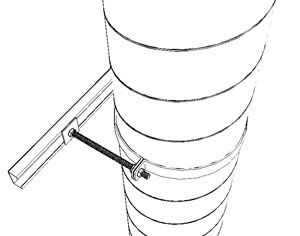
Another method, which has distinct advantages over the method above, is to fix support channel to the wall, and then fix the bracket to that. Screw a length of support channel to the wall (100-200mm + duct diameter), then use slide nuts together with plate washers to fix the studs into the support channel (see the diagram below). The advantage with this method is that any lateral adjustment that may be required is simply a matter of loosening the studs in the channel and sliding left or right. This way you can ensure the duct sits perfectly upright.
Once you have the duct positioned correctly in the brackets, tighten the nuts on the split ring to clamp the duct. As long as the studs aren't too long, you'll find the whole thing is surprisingly solid.
Do you offer an installation service?
Sorry, but we are no longer offering an installation service.